A helmet can only protect your head, or that of your child, if it’s fitted correctly.
I’m always happy to see people on the bike paths and lanes where I live wear bike helmets, but I’m often surprised how many don’t have them adjusted correctly. What’s troubling is that they have made the effort to wear a helmet and believe they are safer for it, but they don’t know that their helmet may not protect them if it isn’t correctly positioned and secure on their heads.
Here are the tips you need on how to fit a bike helmet properly, so you can be absolutely sure your helmet – or your child’s – is able to do its job of protecting you in a crash.
Bonus tip: a damaged bike helmet may be useless in a crash, even if it is fitted properly. Check the helmet for signs of damage every time you use it. This is especially important for your child’s bike helmet. Here’s how to know when to replace a bike helmet.
How to fit a bike helmet properly – quick version: the 2V1 rule
Use the 2V1 rule, and teach it to your kids so they can get the helmet fit right on their own.
2 – No more than two finger breadths from eyebrow to helmet. This keeps the helmet low enough on the forehead to protect the head front and back, and stay in position if a crash should happen.
V – The straps make a V under your ears. That way you know the straps are adjusted to keep the helmet in the correct position. If there’s any floppiness in the straps, the helmet can be dislodged in a crash, and may give no protection.
1 – No more than 1 finger can slip under the chin strap when fastened. That keeps the helmet tight enough to stay in position in a crash.

Steps to fit your bike helmet correctly
First step – make sure the helmet is the right size
Helmets are sized by head circumference, so you can start by measuring with a tape measure to find which range you fall into. Measure just above your brow and around the back of your head where it’s largest. On the other hand, if you can visit a local bike shop, you can just dive in and start trying them on.
Many people find the best way to choose a helmet for the first time is to visit a store in person. That’s because helmets from different manufacturers and model lines have different contours even when sized the same. The only way to know which is going to be comfortable for your own individual head is to try a bunch of them on, much easier to do in person.
Helmets are made to fit a range of heads, using a supply of velcro or self-adhesive pads that come with the helmet to fine tune the fit within that range. When trying helmets on, the goal is to find one that is just a little bigger than your head so you can use some of the supplied padding to make it fit securely and comfortably.
Most helmets these days feature a cradle in back that wraps under the back of your head and is tightened with a dial. If it’s the right size, the helmet will feel snug all over your head and will not wobble around or slip when this fit ring is tightened.
If you feel pressure points on your head when trying a helmet on, even if they are only slightly uncomfortable, try another. That slight pressure can become intensely uncomfortable after an hour or two of cycling with the helmet properly tightened. Voice of experience speaking there…. The goal is for the pressure to be even and comfortable all over your head.
Second step – make sure the helmet is positioned correctly
This is a most important detail for fitting your bike helmet properly: your helmet should sit level on your head, with not much more than an inch of space above your eyebrows, and be level from side to side. A helmet that sits high on the forehead is not going to protect a vulnerable part of your noggin, and worse, can slip off your head altogether when the forces of a nasty crash come into play.
Third step – make sure straps are adjusted evenly
- If your helmet can move backwards to make more than two fingers space above the eyebrows, tighten the front straps. Unbuckle, shorten the front strap by moving the slider forward. Buckle, retighten, test again.
- If your helmet can move forward to your eyebrows, tighten the rear straps. Unbuckle, tighten the back strap by moving the slider back toward the ear. Buckle, retighten your chin strap, and test again.
Strap arrangements can vary quite a bit amongst makes and models, but the principle is the same. Adjust so the the tension is even on all the straps – no loose or bulging straps anywhere, so you can be sure that your helmet will stay exactly where you need it to be in a crash.
Once the helmet straps are set up correctly you shouldn’t have to bother with them again, so it’s worth the effort to get it right at the outset.
How to get a good, safe fit for a your child’s bike helmet

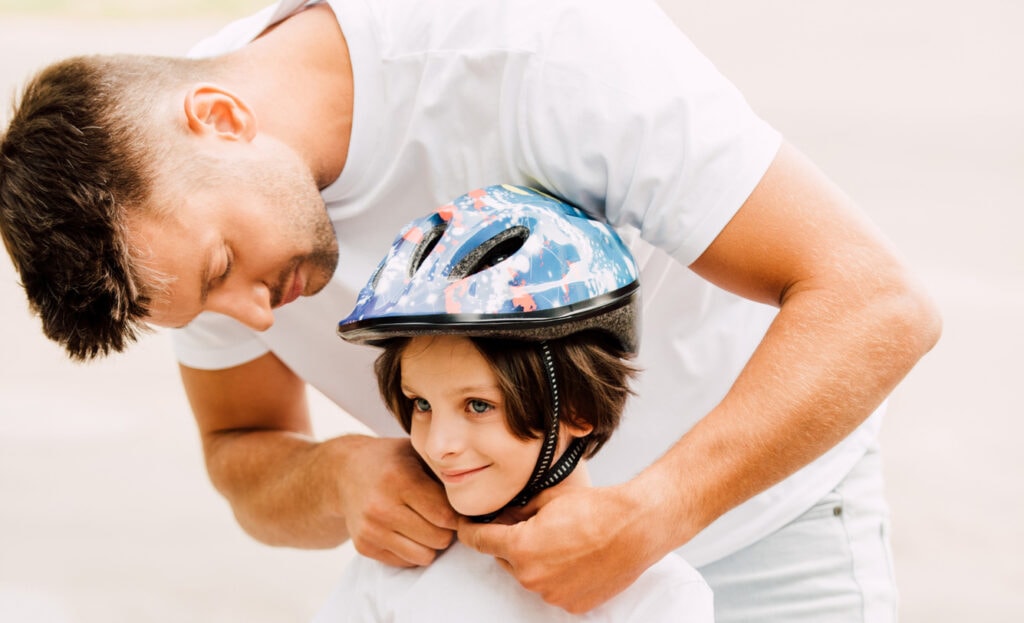
All the steps above apply equally to your child’s bike helmet, but since they will not be able to manage this on their own, you will need to evaluate the fit and adjustment for them. Here’s how to fit a bike helmet properly on your child’s head, with steps to check the adjustment as you go:
- 1. Position the helmet so it is level on their head. (Ask them to use the 2 finger rule so they learn how to check for themselves.)
- 2. Check that the front and back straps make a V that meets below the ears with no floppy or loose straps. (Point out the V shape so they know what to look for.)
- 2. Make sure the chin strap is tight enough by asking your child to open their mouth halfway. If they can feel the helmet pressing down on the top of their head, it is tight enough. (Have them try the 1 finger test to check for themselves.)
- 4. The helmet should sit about an inch above your child’s eyebrows when the straps are fastened. Try pushing the helmet up from the front. If it moves backward, the straps in front of the ears are loose.
- 5. Push up on the back of the helmet. If you can slide it forward or it slips lower on the forehead, you will need to shorten the back straps.
- 6. Push the helmet from side to side, backwards and forwards. The helmet should be snug enough for your child’s skin to wrinkle at the temples rather than slide over.
- 7. If your child wears a ponytail, make sure to check the helmet with the hairstyle they are likely to ride with most of the time.

Full marks for the guy in back, but this girl’s helmet needs to be much lower on her brow for a correct fit.
More on bike helmets: When to replace your bike helmet.
Check out our hand picked selection of bike helmets for women here.


Thank you for posting. As a cyclist and EMT, I also see people wearing helmets incorrectly, even backwards. Helmets do not prevent all concussions or traumatic brain injury, but can lessen the severity and duration of injury.
If parents are concerned about their child’s safety, they should also be wearing helmets to not only model good cycling safety, but protect themselves to be there for their children’s future. How many times have you seen families riding, kids with helmets, parents without? Practice what you preach. Otherwise, should kids assume that they can grow out of the need to wear one?
Great points, Amy. Thank you for commenting.
It is not enough to just put on a bike helmet when cycling. It is also crucial to wear a bike helmet properly. Knowing the right position when using a helmet means getting the optimum protection from the gear.